Yes, you can paint over old paint on a car, but it’s not as simple as just spraying on a new coat. Successful repainting a vehicle by layering new paint over existing paint requires meticulous automotive paint prep and the right techniques. Doing it correctly is key for a durable and attractive finish, and it’s a process that can be tackled as a DIY car painting project with the right knowledge and patience.
This guide will walk you through everything you need to know about painting over old car paint. We’ll cover the essential steps, necessary materials, and critical considerations to ensure your car paint restoration project results in a finish that looks professional and lasts.
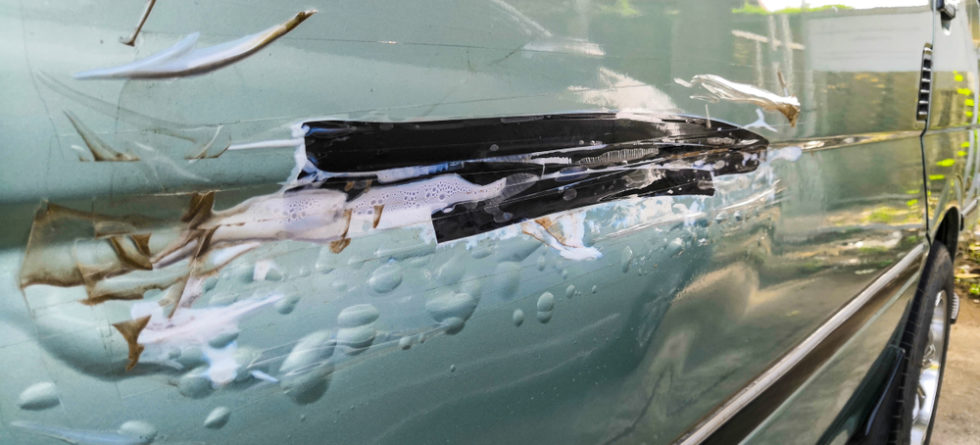
Image Source: globalcollisioncenters.com
Why Consider Painting Over Old Paint?
There are several good reasons why someone might choose to paint over existing car paint instead of completely stripping it down to bare metal.
Cost-Effectiveness
Completely stripping a car down to bare metal and then repainting is a labor-intensive and costly process. It requires specialized tools and materials, and the time investment can be significant. Painting over a prepared existing finish can drastically reduce both the labor and material costs, making it a more accessible option for many car owners looking to refresh their vehicle’s appearance.
Time Savings
The process of stripping a car down to bare metal can take days, even weeks, depending on the car’s condition and the skill of the person doing the work. By skipping this step, you can significantly cut down the overall time commitment for your DIY car painting project. This is especially appealing for those who want to improve their car’s look without dedicating months to the task.
Preserving Originality (Sometimes)
In some cases, the original factory paint has been applied with a quality and durability that is hard to replicate with modern aftermarket paints. If the existing paint is in reasonably good condition, with no significant rust or damage, painting over it can preserve some of that original finish while still providing a fresh look.
When NOT to Paint Over Old Paint
While painting over old paint is possible, there are crucial situations where it’s simply not the best approach. Ignoring these can lead to premature paint failure, poor adhesion, and a frustrating waste of time and money.
Extensive Rust Damage
If your car has widespread rust bubbling under the paint, or if you can see rust holes, painting over it is a recipe for disaster. The rust needs to be completely removed and treated before any new paint is applied. New paint will not stop rust; it will only seal in the problem, and the rust will continue to spread and degrade the metal, eventually pushing off the new paint.
Peeling, Chipping, or Heavily Damaged Paint
Paint that is peeling, flaking, or severely chipped indicates a breakdown in the paint’s adhesion to the substrate. Applying new paint over this will not fix the underlying adhesion issue. The new paint will eventually peel or chip off along with the old, damaged layers.
Poorly Applied Previous Paint Jobs
If the previous paint job was done poorly (e.g., runs, sags, improper application), these imperfections will likely show through the new paint if not properly addressed. In some cases, a poorly applied job may have adhesion problems that necessitate stripping.
Unknown Paint Type
If you are unsure about the type of paint currently on your car (e.g., single-stage versus base coat/clear coat, or even different manufacturer formulations), it can sometimes lead to compatibility issues. While less common with modern paints, extreme differences can sometimes affect adhesion.
The Essential Steps for Painting Over Old Paint
Successfully painting over old paint hinges on thorough preparation. This is arguably the most crucial stage of any automotive paint prep.
Step 1: Thorough Cleaning and Degreasing
Before you touch any sandpaper, the car must be immaculately clean.
- Wash the Vehicle: Use a good quality car wash soap and water. Ensure you get into all crevices, door jambs, and wheel wells.
- Degrease: After washing and drying, use a dedicated automotive degreaser or wax and grease remover. This is vital to remove any wax, silicone, tar, or road film that could compromise car paint adhesion. Apply the degreaser with clean microfiber cloths and wipe off immediately with fresh, clean cloths. Work in small sections.
Step 2: Inspect and Repair Damage
This is where you identify and fix any problems that would prevent a good paint job.
- Check for Imperfections: Look for dents, scratches, rust spots, peeling paint, and any other surface irregularities.
- Repair Dents and Dings: Small dents can often be repaired with body filler. Larger dents may require more extensive bodywork.
- Address Rust: If you find any rust, it must be removed. This typically involves sanding down to bare metal, treating the area with a rust converter, and applying a rust inhibitor. This is non-negotiable for a lasting paint job.
Step 3: Sanding the Existing Paint
This step is critical for creating a surface that the new paint can adhere to properly. It’s not about removing all the old paint, but about scuffing it up.
- Choosing the Right Grit: The grit of sandpaper you use depends on the condition of the existing paint and your goal.
- For lightly oxidized or glossy paint: Start with a medium-grit sandpaper, such as 320-400 grit.
- For paint with minor imperfections or slightly rougher texture: You might start with 220-320 grit.
- Never use very coarse sandpaper (like 80 grit) unless you are removing paint down to the primer or metal, which is not the goal here.
- Sanding Technique:
- Wet Sanding: Many professionals prefer wet sanding. This uses water mixed with a small amount of soap. It helps lubricate the sandpaper, reduces dust, and prevents the sandpaper from clogging as quickly. It also provides a smoother finish.
- Dry Sanding: Can be used, but it generates more dust and can load up sandpaper faster. If dry sanding, use a dust mask and ensure good ventilation.
- Use a Sanding Block or Dual-Action (DA) Sander: A sanding block helps ensure an even surface and prevents you from sanding too deeply into the paint. A DA sander with appropriate pads can speed up the process and provide a uniform scuff.
- Goal of Sanding: The aim is to create a dull, uniform surface. If the paint was glossy, it should become matte. You are essentially creating microscopic scratches that give the new paint something to grip. Ensure you sand all areas where new paint will be applied, including edges and corners.
- Sanding Old Car Paint – Key Considerations:
- Even Coverage: Ensure you sand the entire surface evenly. Do not leave any glossy spots.
- Avoid Sanding Through: Be careful not to sand through the existing paint to the primer or metal unless you are specifically repairing a small spot. If you do sand through, you’ll need to address that area specifically, likely with primer.
- Clean Between Grits: If you are using multiple grits (e.g., starting with 320 and then moving to 400), wash the surface thoroughly between grits to remove any larger abrasive particles that could cause scratches.
Step 4: Tack Cloth Application
After sanding, dust is your enemy.
- Use a Quality Tack Cloth: A tack cloth is a specially treated cloth that picks up fine dust particles.
- Gentle Wiping: Wipe down the entire surface gently. Do not press hard, as this can leave residue from the tack cloth. Use multiple tack cloths if necessary to ensure all dust is removed.
Step 5: Applying Automotive Primer (If Necessary)
Whether you need primer depends on the condition of the old paint and the type of new paint you are using.
- When Primer is Recommended:
- If you sanded through to the original primer or bare metal: You absolutely need to prime these areas.
- For significant repairs with body filler: Body filler needs to be primed over.
- When changing paint colors drastically: A primer can help block out the old color and provide a uniform base for the new color, especially if going from dark to light or vice-versa.
- To enhance adhesion: A high-quality automotive primer acts as a bonding agent between the old paint and the new paint layers.
- Types of Primer:
- High-Build Primer (Primer-Filler): This is excellent for filling in minor imperfections and scratches left by the sanding process. It creates a smooth, uniform surface for the topcoat.
- Etch Primer: Often used on bare metal or aluminum to promote adhesion. If you have sanded down to bare metal in spots, an etch primer is a good first step before applying high-build primer.
- Sealer Primer: Used to prevent solvent from the new paint from attacking or lifting the old paint. This is especially useful when dealing with older paint systems or unknown paint types.
- Application: Follow the manufacturer’s instructions for mixing and application. Apply thin, even coats, allowing adequate flash time between coats. Sand the primer once dry with a fine-grit sandpaper (e.g., 400-600 grit) to create a perfectly smooth surface. Clean thoroughly with a tack cloth after sanding the primer.
Step 6: Applying the Base Coat (Color)
This is where the new color goes on.
- Follow Manufacturer Instructions: Each paint system (e.g., single-stage urethane, base coat/clear coat) has specific application instructions regarding mixing ratios, spray gun settings, and flash times.
- Spray Gun Setup: Ensure your spray gun is clean and set up correctly. A proper fan pattern is crucial for even coverage.
- Application Technique:
- Multiple Thin Coats: It’s always better to apply several thin coats rather than one or two thick ones. This promotes even drying and reduces the risk of runs and sags.
- Consistent Distance and Speed: Maintain a consistent distance from the surface (typically 6-8 inches) and move the spray gun at a steady speed. Overlap each pass by about 50%.
- Flash Time: Allow the recommended “flash time” between coats. This allows solvents to evaporate from the paint layer, preventing the next coat from causing runs or lifting.
- Automotive Paint Techniques: Practice your spraying technique on scrap material before spraying the car. Achieving a uniform finish requires practice and a good understanding of how the paint flows.
Step 7: Applying the Clear Coat
The clear coat provides the gloss, depth, and protection for your paint job.
- Purpose of Clear Coat: It protects the base coat from UV rays, chemicals, and physical damage, and it’s what gives the paint its shine.
- Application: Similar to the base coat, apply multiple thin coats of clear coat.
- First Coat (Mist Coat): Some professionals apply a light “mist coat” first to help the subsequent coats adhere well.
- Subsequent Coats: Apply wet coats, ensuring good coverage and avoiding runs. Maintain consistent spray gun technique.
- Curing Time: Allow the clear coat to cure completely according to the manufacturer’s recommendations. This can range from a day to several days or even weeks, depending on the product and ambient temperature.
Step 8: Wet Sanding and Buffing (Automotive Finishing)
This is the final stage of automotive finishing and is what brings out the deep gloss.
- Wet Sanding: Once the clear coat is fully cured, you may notice minor imperfections like dust nibs, orange peel (a textured surface), or slight imperfections from spraying. You can carefully wet sand these out using very fine grit sandpaper, starting with around 1500-2000 grit and progressing to 3000 grit.
- Buffing and Polishing: After sanding, the paint will look dull. You’ll need to use a polisher (a buffer or a dual-action polisher) with a polishing compound and then a finer polish.
- Cutting Compound: This is a more abrasive compound that removes the sanding marks from the fine-grit sandpaper.
- Polishing Compound: This is less abrasive and further refines the surface, removing swirl marks left by the cutting compound.
- Finishing Polish: The finest polish leaves the surface with a deep, mirror-like shine.
- Waxes and Sealants: After polishing, you can apply a wax or paint sealant to further protect the finish and enhance its gloss.
Essential Materials and Tools
To successfully paint over old paint, you’ll need a specific set of items.
Cleaning & Prep Supplies
- Car Wash Soap
- Automotive Degreaser / Wax and Grease Remover
- Microfiber Towels (plenty of them!)
- Tack Cloths
- Masking Tape and Paper/Plastic Sheeting (for masking off windows, trim, tires, etc.)
- Chemical-Resistant Gloves
- Safety Glasses or Goggles
- Respirator Mask (specifically for paint fumes)
Sanding Supplies
- Assorted Grit Sandpaper (e.g., 220, 320, 400, 600, 1500, 2000, 3000 grit)
- Sanding Blocks (various sizes)
- Dual-Action (DA) Sander (optional but highly recommended)
- Bucket for Water (if wet sanding)
- Mild Soap for Wet Sanding
Painting Supplies
- Automotive Primer (high-build, etch, or sealer as needed)
- Automotive Paint (base coat/clear coat or single-stage)
- Clear Coat
- Reducer and Hardener (specific to your chosen paint system)
- Spray Gun (HVLP – High Volume Low Pressure – is recommended)
- Air Compressor (with moisture and oil separator)
- Paint Strainers
- Paint Mixing Cups and Sticks
Finishing Supplies
- Rubbing/Polishing Compounds
- Polishing Pads (for buffer/polisher)
- Buffer or Dual-Action Polisher
- Microfiber Applicator Pads or Towels
Tips for a Successful DIY Car Painting Project
When undertaking a DIY car painting project, especially painting over old paint, a few extra tips can make a big difference.
- Work in a Clean, Dust-Free Environment: A garage or a temporary spray booth is ideal. Dust is the enemy of a good paint finish.
- Proper Ventilation: Painting involves strong chemicals. Ensure your workspace is well-ventilated, or use proper respiratory protection.
- Temperature and Humidity: Pay attention to the recommended temperature and humidity ranges for the paint products you are using. Extreme conditions can affect drying and curing.
- Test Sprays: Always perform test sprays on scrap material before spraying the actual car. This allows you to check your spray pattern, coverage, and technique.
- Patience is Key: Don’t rush any step, especially preparation and drying/curing times. Rushing leads to mistakes and a poor finish.
- Masking is Crucial: Take your time with masking. Well-applied masking protects areas you don’t want painted and ensures clean lines.
- Read the Paint Manufacturer’s Data Sheets: Every paint product has specific instructions for mixing, application, and drying. Always read and follow these closely.
- Don’t Over-Apply: Too much paint, especially in one coat, can lead to sagging, runs, and improper curing. Thin, even coats are always best.
Frequently Asked Questions (FAQ)
Can I paint over peeling paint?
No, you cannot paint over peeling paint. Peeling paint indicates a failure in adhesion. You must remove all loose and peeling paint down to a solid layer of paint, primer, or bare metal before proceeding with any new paint application.
What is the best sandpaper grit for scuffing old car paint?
For scuffing existing paint to prepare it for new paint, a grit between 320 and 400 is typically recommended. If the paint is in very good condition and just needs a scuff, 400 grit might suffice. If there are minor imperfections or it’s slightly rough, starting with 320 grit is often better.
How long should I wait between coats of paint?
This depends heavily on the specific paint product and ambient temperature. Most automotive paints require a “flash time” between coats, which allows solvents to evaporate. Refer to the paint manufacturer’s technical data sheet for exact times. Typically, it can range from 10-30 minutes for base coats and clear coats.
Do I need to prime over the old paint?
You don’t always need to prime over the entire old paint job if it’s in excellent condition and well-prepped. However, priming is essential if you’ve sanded through to the original primer or bare metal, or if you are using body filler. A good quality primer (like a sealer primer) can also enhance adhesion and prevent potential issues with older paint systems.
How do I deal with small scratches before painting?
Small, shallow scratches can often be sanded out with progressively finer grits of sandpaper. Start with a grit that will remove the scratch (e.g., 320 or 400), then follow up with finer grits (e.g., 600) to smooth the area. For deeper scratches that go down to the metal, you’ll need to treat them as rust repairs, ensuring the metal is clean, treated, and primed.
What is the difference between single-stage and base coat/clear coat?
- Single-Stage Paint: This type of paint contains both the color and the gloss agent in one product. When applied, it dries to a glossy finish. It’s often simpler and less expensive than base coat/clear coat systems.
- Base Coat/Clear Coat: This is a two-part system. The base coat provides the color, and it dries to a matte finish. The clear coat is then applied over the base coat to provide the gloss, depth, and protection. This system is more durable and offers a deeper shine, and is more commonly used on modern vehicles.
By following these detailed steps and paying close attention to surface preparation for car paint, you can achieve a professional-looking finish when repainting a vehicle over its old paint. Remember, the success of your paint job is largely determined by the quality of your preparation.