Can you remove swirl marks from your car by hand? Yes, you absolutely can remove swirl marks from your car by hand with the right products and techniques.
Swirl marks, those frustrating spider web scratches that mar your car’s paintwork, are a common sight. They often appear as a hazy network of fine scratches on the surface, especially noticeable in direct sunlight or under bright lights. These imperfections are typically caused by improper washing and drying techniques, using abrasive cloths, automatic car washes with dirty brushes, or even light contact with dirt and grit. While professional detailing often employs machine polishers for speed and efficiency, it’s entirely possible to achieve excellent results in car paint correction by hand. This comprehensive guide will walk you through the process of hand polishing car paint to effectively tackle these unsightly marks.
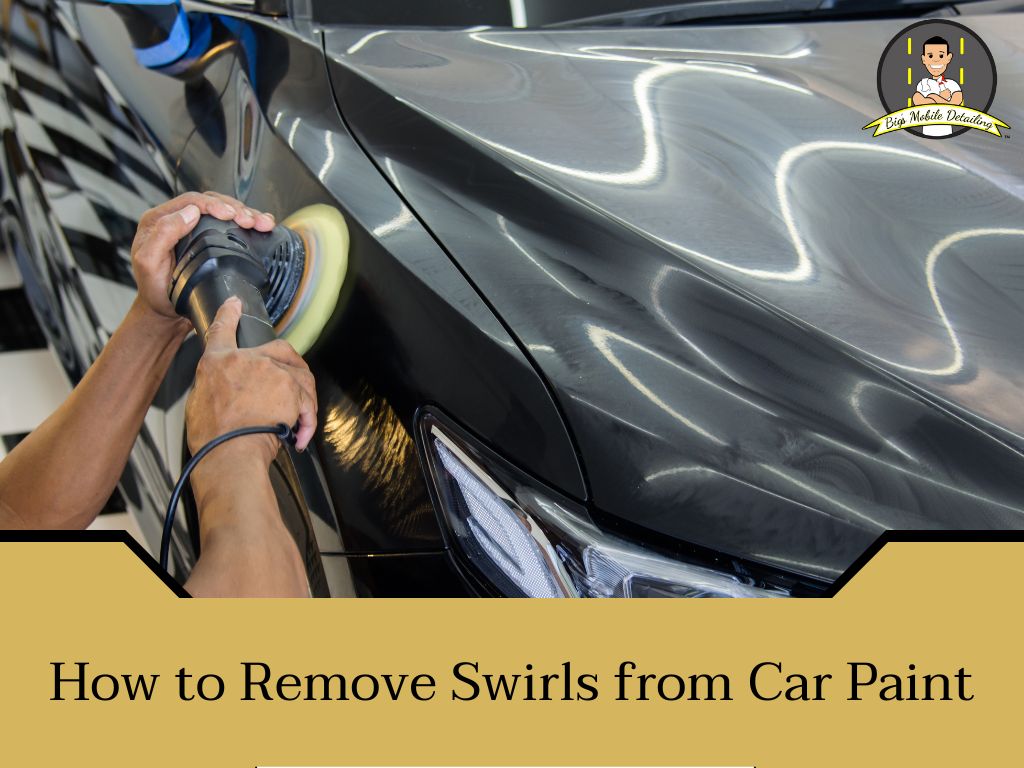
Image Source: 149881442.v2.pressablecdn.com
What are Swirl Marks and How Do They Happen?
Swirl marks are essentially shallow scratches that occur on the clear coat of your car’s paint. They are not deep enough to reach the colored layer, which is why they appear as a surface haze rather than a distinct scratch.
Common Causes of Swirl Marks:
- Improper Washing: Using dirty wash mitts, sponges with harsh textures, or washing in direct sunlight can introduce grit to the surface, leading to scratches as you move the mitt.
- Low-Quality Towels: Using old, worn-out, or abrasive towels for drying or wiping can create micro-scratches.
- Automatic Car Washes: The brushes in many automatic car washes can be harsh and laden with dirt from previous vehicles, leading to significant swirl marks.
- Dust and Grit: Simply brushing against a dusty car can leave fine scratches.
- Improper Drying: Rubbing the paint dry instead of gently blotting can induce scratches.
The good news is that most swirl marks are in the clear coat, making them correctable with a bit of effort and the right approach to removing spider web scratches car.
Preparing Your Vehicle for Hand Polishing
Before you can start buffing out swirl marks, meticulous preparation is key. This ensures you’re working on a clean surface and won’t be grinding existing dirt into the paint, causing even more damage.
Thorough Washing
- Two-Bucket Method: This is crucial for preventing swirl marks during the washing process itself.
- Bucket 1 (Wash): Fill with your car wash soap and water.
- Bucket 2 (Rinse): Fill with clean water.
- Use a high-quality wash mitt (microfiber is best). Dip the mitt into the wash bucket, wash a section of the car, then rinse the mitt thoroughly in the rinse bucket before dipping it back into the wash bucket. This separates the dirt from your clean wash solution.
- pH-Neutral Car Wash Soap: Use a dedicated car wash soap that won’t strip away existing wax or sealants.
- Gentle Washing: Work from the top of the car downwards. Avoid excessive pressure.
- Rinse Thoroughly: Ensure all soap residue is removed.
Decontamination
Even after a thorough wash, your paint might still have bonded contaminants that need removing.
Clay Bar Treatment
A clay bar is a pliable material that, when used with a lubricant, safely lifts embedded contaminants like industrial fallout, brake dust, and tree sap from the paint surface.
Steps for Clay Bar Treatment:
- Lubricant: Use a dedicated clay lubricant or a diluted solution of car wash soap and water. Never use clay bar dry.
- Knead the Clay: Take a small piece of clay and flatten it.
- Glide Gently: Spray the lubricant onto a small section of the car’s paint. Glide the clay bar gently over the lubricated surface. You’ll feel a slight resistance or hear a “squeaking” sound as it lifts contaminants.
- Inspect and Knead: As the clay picks up dirt, fold and knead it to expose a fresh surface. If you drop the clay, discard it immediately as it will have picked up grit.
- Wipe and Dry: After claying a section, wipe it clean with a clean microfiber towel and dry the area if necessary.
Iron Remover (Optional but Recommended)
For heavily contaminated vehicles, an iron remover spray can break down iron particles (like brake dust) that are bonded to the paint.
How to Use Iron Remover:
- Spray onto a dry surface after washing.
- Let it dwell for the time recommended by the manufacturer (usually a few minutes).
- You’ll see it turn purple as it reacts with the iron particles.
- Rinse thoroughly with water.
Drying
Gently dry the vehicle using high-quality, plush microfiber drying towels. Blot the water rather than rubbing.
The Core Process: Hand Polishing for Swirl Mark Removal
Now that your car is prepped, it’s time for the actual car detailing swirl mark removal. This involves using a polishing compound or polish to gently abrade the clear coat, leveling out the microscopic peaks and valleys that create swirl marks.
Choosing the Right Products: The Best Hand Polish for Swirl Marks
Selecting the correct products is critical for successful DIY car paint polishing.
- Polishing Compounds: These are generally more aggressive and contain finer abrasives. They are designed to remove moderate to heavy swirl marks and scratches.
- Polishes: These are less aggressive than compounds and are used for lighter imperfections, enhancing gloss, and finishing after compounding.
- Microfiber Applicator Pads: These are essential for applying compounds and polishes by hand. They provide a consistent surface for working the product.
- Microfiber Towels: You’ll need several clean, high-quality microfiber towels for buffing off the polish residue.
Types of Abrasives
- Diminishing Abrasives: These are designed to break down into finer particles as you work them. They start with a bit more cutting power and finish with a polishing effect. Many modern polishes use this technology.
- Non-Diminishing Abrasives: These abrasives maintain their size throughout the polishing process. They offer more consistent cutting power but can sometimes require a follow-up with a finer polish to remove haze.
The Hand Polishing Technique: Car Paint Correction By Hand
This is where the manual labor comes in, but with the right technique, it’s very effective for automotive paint scratch repair hand.
Steps for Hand Polishing:
- Work in Small Sections: Divide the car into manageable sections, typically about 2ft x 2ft. This ensures you can work the product evenly before it dries.
- Apply Product to Applicator: Place a small amount (a dime-sized dollop) of polish or compound onto your microfiber applicator pad. Don’t overload it.
- Apply to Paint: Gently spread the product over the section of the paint you’re working on.
- Polish with Overlapping Strokes: This is the core of hand polishing car paint.
- Pattern: Use a cross-hatch pattern. Work the polish horizontally across the section, then vertically. This ensures even coverage and correction.
- Pressure: Apply moderate, consistent pressure. Imagine you’re trying to spread butter evenly on toast. Don’t press too hard, as this can create new marring or make the polishing process inefficient.
- Work Until Clear: Continue working the product until it becomes clear or starts to break down (if using diminishing abrasives). You should feel a slight drag, but it shouldn’t feel like you’re grinding the paint.
- Buff Off Residue: Using a clean, dry microfiber towel, gently buff off the dried polish residue. Again, use light pressure and a gentle motion.
- Inspect Your Work: Look at the section under good lighting. You should see a reduction in swirl marks. If needed, you can apply a second pass.
- Move to the Next Section: Overlap slightly with the previous section to ensure a uniform finish.
Hand Compounding Swirl Marks
If you have deeper swirl marks or light scratches, you might need to start with a polishing compound. Compounds have larger abrasives than polishes and are more aggressive.
When to Use a Compound:
- Noticeable swirl marks.
- Light to medium clear coat scratches.
- Removing imperfections before applying a finer polish.
Hand Compounding Technique:
The technique is similar to hand polishing, but you’ll generally use slightly more pressure and work the compound until it becomes clear. Because compounds are more aggressive, it’s often recommended to follow up with a finer polish to restore gloss and remove any light haze the compound may have introduced.
Table: Compound vs. Polish – When to Use What
| Feature | Polishing Compound | Polish |
|---|---|---|
| Abrasiveness | Moderate to High | Low to Moderate |
| Purpose | Remove heavier swirls, scratches, oxidation | Refine finish, remove light swirls, enhance gloss |
| Follow-up | Often requires a polish afterward | Can be used as a final step |
| Application | Works well for initial correction | Best for finishing and maintenance |
Reducing Paint Imperfections by Hand
The goal of hand polishing is to reduce these paint imperfections without creating new ones. Patience and a systematic approach are key.
Tips for Success:
- Good Lighting: Work in an area with excellent lighting. A portable work light or detailing light can help you see imperfections clearly.
- Cleanliness is Paramount: Ensure your applicator pads and microfiber towels are always clean. Contaminated tools are the enemy of a swirl-free finish.
- Don’t Rush: Take your time. Car detailing swirl mark removal by hand is a labor of love.
- Listen to Your Paint: Pay attention to how the polish is working. If you’re not seeing results, you might need a slightly more aggressive product or a bit more pressure. If you start seeing haze or dullness, you might be pressing too hard or the product may have dried out.
- Protect Your Work: After polishing, it’s crucial to protect the corrected paint. Apply a high-quality wax, sealant, or ceramic coating. This not only adds shine but also provides a layer of protection against future contaminants.
What to Do If Swirl Marks Persist
If you’ve gone through the hand polishing process and some deeper swirls remain, there are a few options:
Multiple Passes
Sometimes, a second or even third pass over the same area with the polish can yield better results. Ensure you’re using a clean applicator and towel for each pass.
More Aggressive Polish/Compound
If your initial product wasn’t aggressive enough, you might need to try a slightly more aggressive polish or a light compounding product. Always test in an inconspicuous area first to gauge its effectiveness and potential for marring. Remember, the goal is automotive paint scratch repair hand, not creating new damage.
Machine Polishing
For very stubborn or deep swirl marks, or if you’re finding hand polishing too labor-intensive, machine polishing might be necessary. A dual-action (DA) polisher is generally recommended for DIYers as it’s less aggressive and safer than a rotary polisher. However, the focus of this guide is hand methods.
Protecting Your Paint After Swirl Mark Removal
Once you’ve successfully removed the swirl marks, protecting your newly corrected paint is essential to keep it looking its best and prevent new imperfections.
Waxes
Waxes offer a warm glow and are generally easy to apply and remove. They provide a good level of protection but typically last a few weeks to a few months.
Sealants
Paint sealants are synthetic coatings that bond to the paint and offer more durable protection than traditional waxes, often lasting 6 months or longer. They tend to provide a sharper, more reflective shine.
Ceramic Coatings
Ceramic coatings offer the most durable protection, typically lasting years. They create a hard, sacrificial layer that is highly resistant to chemicals, UV rays, and light scratches. Applying a ceramic coating is a more involved process and often requires a perfectly prepped surface, making it an excellent follow-up after extensive paint correction.
Frequently Asked Questions (FAQ)
Q1: How long does it take to remove swirl marks by hand?
A1: The time it takes depends on the severity of the swirl marks, the size of your vehicle, and your pace. For a full-size car with moderate swirl marks, expect to spend anywhere from 4 to 12 hours or more.
Q2: Can I use household cleaning products to remove swirl marks?
A2: No, it’s strongly advised against using household cleaners. They are often too abrasive or contain chemicals that can damage your car’s clear coat. Always use products specifically designed for automotive paint care.
Q3: Will polishing remove wax or sealant from my car?
A3: Yes, polishing compounds and polishes are designed to remove a layer of the clear coat to correct imperfections. This process will also remove any existing wax or sealant on the paint. That’s why protection is crucial after polishing.
Q4: How do I know if a scratch is too deep to remove by hand?
A4: If you can feel the scratch with your fingernail, it’s likely too deep to be removed by hand polishing. Deep scratches penetrate the clear coat and often require professional attention or repainting.
Q5: How often should I polish my car?
A5: Polishing removes a thin layer of clear coat. It’s not something you should do frequently. Typically, polishing is done once or twice a year, or as needed, to correct accumulated swirl marks and imperfections. Regular washing and waxing/sealing will help maintain the finish between polishes.
Q6: What’s the difference between polishing and waxing?
A6: Polishing uses abrasives to physically remove imperfections and level the paint surface. Waxing (or sealing) applies a protective layer on top of the paint to add gloss and protection. You polish to correct, and you wax/seal to protect.
By following this comprehensive guide, you can confidently tackle swirl marks and restore the deep, lustrous shine to your car’s paintwork using only your hands and the right products. Remember, patience and attention to detail are your greatest allies in achieving a flawless finish.