Can you hand buff a car? Yes, you absolutely can hand buff a car to achieve a stunning, showroom-quality shine. While machine buffing is faster and often preferred by professionals, manual buffing is a highly effective and rewarding way to restore your vehicle’s paintwork and achieve impressive results, especially for those new to car detailing or who prefer a more tactile approach. This guide will walk you through the entire process, from preparation to the final polish, ensuring you get a brilliant finish.
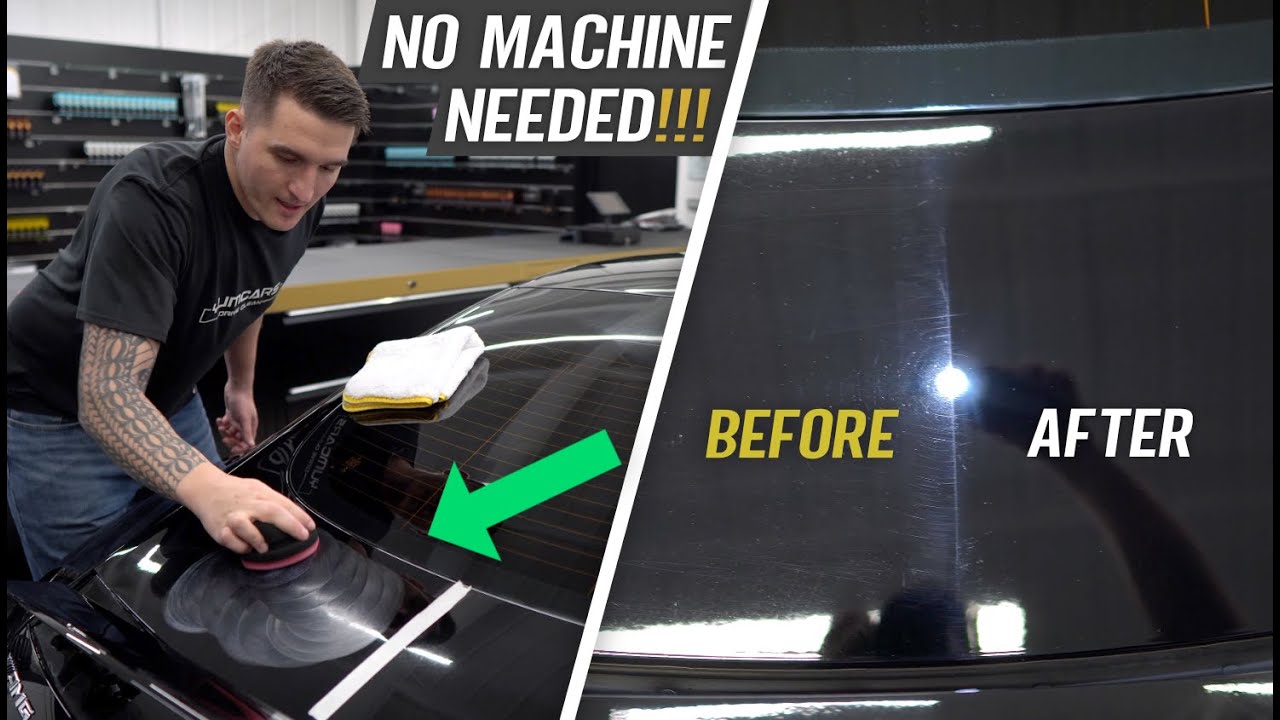
Image Source: i.ytimg.com
The Art of Car Polishing: Bringing Back the Brilliance
Car polishing is the process of removing minor imperfections from your car’s paint surface. These imperfections, like light scratches, swirl marks, and oxidation, dull the paint’s shine. Hand buffing allows you to gently abrade and level these imperfections, revealing the smooth, reflective paint underneath. It’s a key step in automotive finishing and a crucial part of effective car detailing.
Why Hand Buff? Advantages and Considerations
Hand buffing offers several distinct advantages, particularly for the enthusiast or someone starting their car detailing journey:
- Control: You have direct, tactile control over the entire process, making it easier to feel what you’re doing and avoid damaging the paint.
- Cost-Effective: It requires a smaller initial investment compared to purchasing a good quality orbital or rotary polisher.
- Accessibility: It can be done anywhere with good lighting and a clean workspace.
- Soothing Process: For many, the hands-on nature of hand buffing can be quite therapeutic.
However, it’s important to acknowledge the limitations:
- Time-Consuming: Achieving a perfect finish by hand will take significantly longer than using a machine.
- Physical Effort: It requires considerable physical effort, especially on larger vehicles or for deep paint correction.
- Less Aggressive: Hand buffing is generally less aggressive than machine polishing, meaning it might not be able to remove very deep scratches or heavy oxidation.
Essential Tools for Your Hand Buffing Mission
To embark on your car polishing adventure, gather these vital tools:
- Car Wash Soap: A pH-neutral soap specifically designed for cars.
- Wash Mitt and Buckets: Two buckets – one for soapy water, one for rinsing your mitt.
- Drying Towels: High-quality, plush microfibre cloths for drying.
- Clay Bar and Lubricant: To remove embedded contaminants from the paint surface.
- Polishing Compound: Choose one appropriate for the level of correction needed (e.g., a fine cut for light swirls, a medium cut for more noticeable defects).
- Car Polish: A finer polish to refine the finish after compounding.
- Applicator Pads: Foam or microfibre applicator pads for applying compounds and polishes.
- Buffing Pads: Microfibre or foam buffing pads for working the products into the paint. Ensure you have a variety for different tasks.
- Microfibre Cloths: Plenty of clean, high-quality microfibre cloths for wiping away residue and buffing to a shine.
- Paint Cleaner/Pre-Wax Cleaner (Optional): To further prep the surface and ensure maximum gloss.
- Car Wax or Sealant: For protection after polishing.
- Gloves and Safety Glasses: To protect your hands and eyes.
Preparing Your Vehicle: The Foundation for a Flawless Finish
Before you even think about applying any product, meticulous preparation is paramount. This stage is crucial for effective paint correction and a superior final result.
The Wash and Decontamination Process
-
The Two-Bucket Wash:
- Fill one bucket with your car wash soap and water.
- Fill the second bucket with clean water for rinsing.
- Dip your wash mitt into the soapy water.
- Wash a section of your car from top to bottom.
- Rinse the dirty wash mitt thoroughly in the clean water bucket before returning it to the soapy water. This prevents transferring grit back onto the paint.
- Work in manageable sections to avoid the soap drying on the surface.
-
Thorough Drying:
- Use large, plush microfibre drying towels.
- Gently pat or blot the water away. Avoid rubbing, which can create micro-scratches.
- Ensure all crevices, door jambs, and trim are dried completely. Water left behind can lead to water spots.
-
Clay Bar Treatment:
- Purpose: A clay bar removes bonded contaminants like industrial fallout, tree sap, and brake dust that washing alone cannot remove. This is essential for a truly smooth surface and for swirl mark removal.
- How to: Spray a dedicated clay lubricant generously onto a small section of the paint. Glide the clay bar gently over the lubricated surface. You’ll feel the clay grab and then release as it picks up contaminants. Fold and knead the clay as it becomes dirty to expose a clean surface. Work in small, overlapping sections.
- Wipe Down: After claying a section, wipe the area clean with a fresh microfibre cloth.
Inspecting Your Paintwork: Pinpointing the Flaws
Once clean and decontaminated, it’s time to inspect your paintwork under good lighting. Natural daylight is best, or use a high-intensity detailing light. Look for:
- Swirl Marks: Fine, circular scratches that appear as cobweb-like patterns.
- Light Scratches: Deeper than swirls but not through the clear coat.
- Oxidation: A dull, faded appearance, often on older vehicles.
- Water Spots: Mineral deposits left behind after water has dried.
- Rinsing Marks: Sometimes the soap residue can dry on the paint.
Masking Up: Protecting Sensitive Areas
Masking is crucial to protect trim, rubber seals, plastic, and unpainted surfaces from the polishing compounds and polishes.
- Use Automotive Masking Tape: This tape is designed to adhere well but remove cleanly without leaving residue.
- Cover Everything: Carefully tape off rubber seals around windows and doors, black plastic trim, headlights, taillights, and any other area you don’t want to polish. If you’re polishing by hand, you have a little more leeway, but it’s always best practice to mask.
The Hand Buffing Process: Step-by-Step Guidance
Now for the main event: the manual buffing. This requires patience and a methodical approach.
Choosing Your Products: Compound vs. Polish
- Polishing Compound: This is an abrasive product designed to remove paint defects. It’s the heavier hitter. You’ll typically start with a compound if you have visible scratches or significant swirl marks. Compounds come in different levels of aggressiveness (cut).
- Car Polish: This is a finer product, often containing very mild abrasives or fillers. It’s used after compounding to refine the finish, remove light hazing left by the compound, and enhance gloss. If your paint only has very light imperfections or you’re just looking to restore shine, you might only need polish.
Applying Polish and Compound by Hand
-
Select the Right Applicator Pad:
- Foam Applicator Pads: Good for applying products evenly. You’ll typically use a firmer foam for compounding and a softer foam for polishing.
- Microfibre Applicator Pads: Excellent for both applying and initial buffing of polishes.
-
Product Application:
- Amount: Apply a small, coin-sized amount of compound or polish directly onto the applicator pad. Don’t overdo it.
- Distribution: Spread the product evenly across the pad’s surface.
-
The Buffing Motion:
- Work in Small Sections: Focus on a small area at a time, roughly 2ft x 2ft. This ensures the product doesn’t dry out and you maintain control.
- Gentle Pressure: Apply moderate, consistent pressure. You’re aiming to work the abrasives into the paint.
- Cross-Hatching Pattern: Move the applicator pad in a back-and-forth motion, then repeat in a side-to-side motion over the same area. This cross-hatching ensures even coverage and consistent abrasion.
- Smooth Strokes: Keep your strokes smooth and overlapping. Avoid short, choppy movements.
-
Buffing Off the Residue:
- Use Clean Microfibre Cloths: Once you’ve worked the product into the paint for the recommended time (check the product label, usually 30-60 seconds of working time), use a clean, plush microfibre cloth to gently wipe away the residue.
- Buff to a Shine: Buff the area with a separate clean microfibre cloth until the haze disappears and the paint looks clear and shiny. Flip your buffing cloths frequently to ensure you’re always using a clean surface.
Stage 1: Compounding for Paint Correction
If you are undertaking significant paint correction, this is where you’ll use your polishing compound.
- Start with a Fine Compound: Unless you have deep scratches, begin with the least aggressive compound. You can always move to a more aggressive one if needed, but it’s harder to undo aggressive polishing.
- The Process: Apply the compound to your foam applicator pad. Work it into a 2ft x 2ft section using the cross-hatching motion with moderate pressure. You’ll feel the compound “break down” as you work it.
- Wipe and Inspect: Wipe away the residue with a clean microfibre cloth. Inspect the area. Have the swirl marks reduced? Is the paint looking clearer?
- Repeat if Necessary: If defects remain, you can repeat the process on the same section. Avoid excessive passes, as this can overheat the paint or remove too much clear coat.
Stage 2: Refining the Finish with Polish
After compounding (or if compounding wasn’t necessary), you’ll move to the car polish.
- Product Application: Apply your chosen car polish to a clean foam or microfibre applicator pad.
- Lighter Pressure: Use lighter pressure than you did with the compound. The goal here is to refine the finish, remove any light hazing left by the compound, and enhance gloss.
- Buffing Motion: Continue with the cross-hatching pattern over 2ft x 2ft sections.
- Wipe and Inspect: Wipe away the residue with a clean microfibre cloth and buff to a high gloss. You should notice a significant improvement in clarity and depth.
Working Panel by Panel
It’s crucial to work on one panel at a time. For example, do the entire hood, then move to a fender, then a door. This ensures you don’t lose track of where you’ve polished and that you maintain consistency.
Tips for Effective Hand Buffing
- Work in the Shade: Direct sunlight can cause products to dry too quickly, making them difficult to work with and potentially causing streaking or hazing.
- Keep Products and Cloths Clean: Contamination is the enemy. Ensure your pads and cloths are free from grit.
- Don’t Rush: Patience is key to a good result. Enjoy the process!
- Listen to Your Paint: If the paint feels warm, take a break. Overheating can damage the clear coat.
- Test Spot: If you’re unsure about a product or your technique, always start with a small, inconspicuous test spot.
Protecting Your Newly Polished Paintwork: Waxing and Beyond
After all your hard work polishing, it’s vital to protect the freshly exposed clear coat. This is where waxing a car comes in.
Applying Car Wax or Sealant
- Choose Your Protection: Car wax (like Carnauba) provides a warm, deep gloss and good UV protection. Paint sealants offer longer-lasting durability and often a sharper, more reflective shine.
- Application: Apply a thin, even layer of wax or sealant to a clean foam or microfibre applicator pad.
- Work in Sections: Apply the product to the paint surface in a thin, even layer, using light, overlapping circular or back-and-forth motions. Again, work in 2ft x 2ft sections.
- Curing Time: Allow the wax or sealant to haze over according to the manufacturer’s instructions (this can range from a few minutes to 15-20 minutes).
- Buffing Off: Use a clean, plush microfibre cloth to gently buff away the haze and reveal a deep shine. Flip the cloth frequently.
Maintaining the Shine
Regular washing with a pH-neutral soap and proper drying techniques will help maintain your car’s showroom shine. You might also consider applying a quick detailer spray between washes for a boost of gloss and protection.
Troubleshooting Common Issues
- Streaking: This usually occurs if product residue is not fully removed, or if the product dried too quickly. Ensure you are using clean microfibre cloths and buffing thoroughly.
- Hazing: Can be caused by using the wrong product for the paint condition, insufficient buffing, or working in direct sunlight.
- Swirl Marks Still Visible: You may need a slightly more aggressive compound or more passes with the current one. Ensure you are applying adequate but not excessive pressure. Remember, extremely deep scratches may not be fully removable by hand.
Frequently Asked Questions (FAQ)
How often should I hand buff my car?
This depends on your car’s condition, exposure to elements, and how often it’s driven. Generally, a light polish to maintain shine can be done every 3-6 months. For more significant paint correction, you might only do it once a year or as needed.
Can I use household products for car polishing?
No, it is strongly advised against using household cleaners or abrasive pads like kitchen sponges. These can severely scratch and damage your car’s paintwork. Always use products specifically designed for automotive finishing.
What’s the difference between compounding and polishing?
Compounding is an abrasive process that removes deeper imperfections like scratches and oxidation. Polishing is a finer process that refines the paint’s surface, removes light hazing left by compounding, and enhances gloss.
How much pressure should I use when hand buffing?
You should apply moderate, consistent pressure. It’s enough to work the abrasives in the product but not so much that you risk damaging the paint or overheating it. You should be able to feel the product working.
Can I remove deep scratches by hand buffing?
Hand buffing is effective for minor to moderate scratches and swirl marks. Very deep scratches that you can feel with your fingernail might be too deep to remove entirely without professional machine polishing or repainting.
By following these steps, you can achieve a remarkable, showroom-quality shine on your car through the rewarding process of hand buffing. It’s a testament to the care you put into your vehicle.