Can you easily remove pollen from your car? Yes, you can! With the right tools and techniques, getting pollen off your car quickly and easily is very achievable.
Spring and summer bring beautiful blooms, but also a sticky, yellow coating to our vehicles: pollen. This fine powder, released by plants, can quickly cover your car in a noticeable layer, making it look dirty and dull. But don’t worry, removing it is simpler than you might think. This guide will walk you through how to effectively wash pollen off your car, using the best methods and products for a sparkling clean finish.
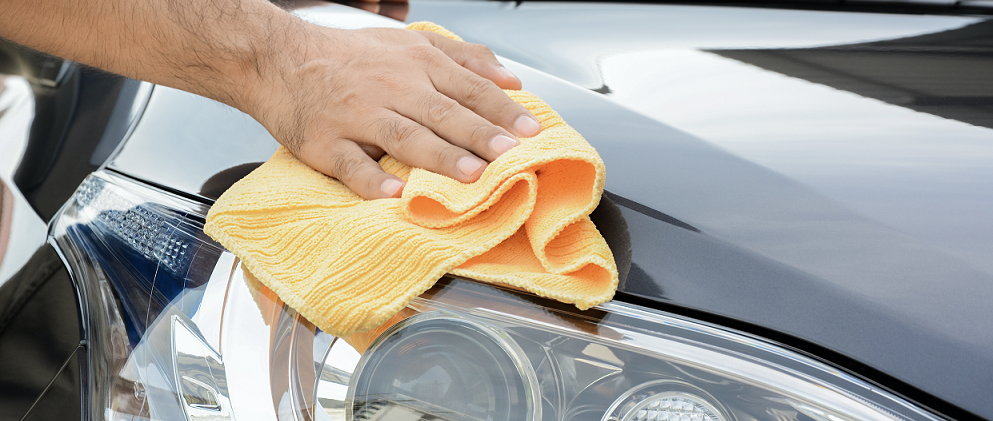
Image Source: static.foxdealer.com
Why Pollen on Your Car Needs Attention
Pollen isn’t just an eyesore; it can actually cause damage if left on your car for too long. The sticky residue can attract dirt and grime, creating a more stubborn layer. Furthermore, if the pollen gets wet and dries, it can bake onto your paintwork, making removal harder. Some types of pollen can even be slightly acidic, potentially etching the clear coat over time. Therefore, tackling the car pollen problem promptly is crucial for maintaining your vehicle’s appearance and protecting its finish.
Gathering Your Car Wash Supplies for Pollen
Before you start, having the right car wash supplies pollen is key to an efficient and safe cleaning process. Using the wrong items can scratch your paint or make the pollen harder to remove.
Essential Tools for Pollen Removal
- Two Buckets: One for soapy water and one for rinsing your wash mitt. This is the cornerstone of the two-bucket wash method, preventing you from spreading dirt back onto your car.
- High-Quality Car Wash Soap: Choose a pH-neutral soap specifically designed for cars. This will effectively lift pollen without stripping away existing wax or sealant.
- Microfiber Wash Mitts: These are soft and absorbent, designed to trap dirt particles and minimize the risk of scratching your paint. Have at least two – one for the upper parts of the car and one for the lower, dirtier areas.
- Microfiber Drying Towels: Large, plush microfiber towels are best for safely drying your car without leaving lint or causing swirls.
- Hose with a Spray Nozzle: A good water flow is essential for rinsing away loosened pollen.
- Optional: Foam Cannon or Sprayer: For a pre-wash foam application, which can help lift and loosen stubborn pollen.
- Optional: Wheel Cleaner and Brushes: Pollen can accumulate on wheels too.
Choosing the Right Car Pollen Remover
While a good car wash soap is your primary car pollen remover, sometimes a more targeted approach is needed for stubborn spots.
- Pre-Wash Treatments: For heavily pollen-covered cars, a pre-wash spray can be beneficial. These are designed to loosen dirt and pollen before you even touch the car with a mitt.
- Quick Detailer Sprays: After washing and drying, a quick detailer can add extra shine and help repel future dirt.
The Step-by-Step Guide to Washing Pollen Off Your Car
The best way to wash pollen involves a systematic approach that prioritizes protecting your car’s paint.
Step 1: The Pre-Wash Rinse (Crucial for Pollen)
This is arguably the most important step when dealing with pollen. Pollen can be very abrasive, like fine sandpaper. If you just start scrubbing with a wash mitt, you’ll grind that abrasive pollen into your paint.
- Thoroughly Rinse: Use your hose with a strong jet spray to rinse as much loose pollen off the car as possible. Start from the roof and work your way down. Pay attention to crevices, panel gaps, and grilles where pollen can get trapped.
- Consider a Pre-Wash: If you have a foam cannon or a pump sprayer, apply a dedicated car pre-wash solution. Let it dwell for a few minutes (follow product instructions) to help lift and encapsulate the pollen particles. Then, rinse thoroughly again. This step significantly reduces the risk of scratching.
Step 2: The Two-Bucket Wash Method
This method is vital for safe pollen removal car and preventing scratches.
- Prepare Your Buckets: Fill one bucket with your car wash soap and water mixture. Fill the second bucket with plain rinse water.
- Wash from Top to Bottom: Dip your clean microfiber wash mitt into the soapy water bucket.
- Gentle Washing: Wash one section of the car at a time, using straight-line motions, not circles. Start with the roof, then the hood, trunk, upper door panels, and finally the lower sections of the car.
- Rinse the Mitt: After washing each section, rinse the dirty wash mitt thoroughly in the plain water bucket. This removes the pollen and dirt from the mitt before dipping it back into the soapy water.
- Repeat: Continue this process, working your way around the entire vehicle. Regularly refresh your rinse water if it becomes visibly dirty.
Step 3: Wheels and Tires (Separate and First if Heavily Soiled)
Wheels are usually the dirtiest part of the car. It’s often best to wash them first, or at least with separate mitts and buckets, to avoid transferring brake dust and road grime to your paintwork.
- Apply Wheel Cleaner: Spray a pH-neutral wheel cleaner onto one wheel at a time.
- Agitate: Use dedicated wheel brushes to agitate the cleaner and loosen brake dust and pollen.
- Rinse: Rinse the wheel thoroughly.
- Repeat: Do this for all four wheels.
Step 4: Rinsing the Car
Once you’ve finished washing, it’s time to rinse off all the soap and loosened pollen.
- Gentle Rinse: Start from the roof and work your way down, using a gentle flow of water.
- Sheeting the Water: For the final rinse, remove the spray nozzle and let water flow freely from the hose. This helps the water sheet off the car, reducing the amount of water left behind to dry and potentially spot.
Step 5: Drying the Car Safely
Drying is another critical stage where scratches can occur.
- Use Microfiber Drying Towels: Blot the water gently with your plush microfiber drying towels. Avoid rubbing vigorously.
- Work Section by Section: Dry one panel at a time to prevent water from sitting and causing water spots.
- Door Jams and Crevices: Don’t forget to dry door jams, trunk edges, and other areas where water can hide and drip later.
Tackling Stubborn Pollen and Tree Sap
Sometimes, pollen isn’t the only issue. Tree sap can often accompany pollen, creating a stickier, more challenging situation. For these instances, a specialized car pollen cleaner for cars or specific sap remover might be needed.
Removing Tree Sap from Car
Tree sap is a notoriously sticky substance that can harden and bond to your car’s paint.
- Immediate Action: The sooner you address tree sap, the easier it will be to remove.
- Rubbing Alcohol (Isopropyl Alcohol): A solution of 70% isopropyl alcohol mixed with water can be effective. Apply to a microfiber towel, hold it on the sap for a few seconds to soften it, then gently wipe. Always test this in an inconspicuous area first.
- Dedicated Bug and Tar Remover: Many automotive bug and tar removers are also excellent at breaking down tree sap. Follow product instructions carefully.
- Car Wash Soap: For fresh, light sap, a good car wash soap might be enough, especially after a thorough pre-wash.
- Clay Bar: If sap has hardened, a clay bar can be used after washing and drying to safely lift the contaminants from the paint surface. This should be done with a lubricant spray (like a quick detailer or dedicated clay lubricant).
Dealing with Pollen Stains
While pollen itself doesn’t typically “stain” in the traditional sense of dye transfer, the residue left behind after it bakes onto the paint can look like a stain.
- Thorough Washing: The two-bucket wash method with a quality soap is your first line of defense.
- Detailing Clay: If washing doesn’t fully remove the residue, a clay bar is the next step. It works by physically lifting bonded contaminants from the paint.
- Polishing: In rare cases where the residue has slightly etched the clear coat, a light polish might be necessary. This should be followed by waxing or sealing to protect the newly exposed clear coat.
Quick Pollen Cleaning Strategies
If you’re short on time but need to deal with a light dusting of pollen, here are some quick pollen cleaning car methods:
Quick Detailer Spray
For a light coating of pollen on an otherwise clean car, a quick detailer spray is your best friend.
- Spray Generously: Lightly mist a panel with your quick detailer.
- Gentle Wipe: Use a clean, plush microfiber towel to gently wipe away the pollen. Fold the towel to expose a clean surface frequently.
- Flip and Buff: Use a second, dry microfiber towel to buff the area to a shine.
Caution: This method is best for very light pollen. If the pollen is thick or has been on the car for a while, you risk scratching the paint by rubbing it without proper lubrication.
Waterless Car Wash Products
Similar to quick detailers, waterless wash sprays are formulated with lubricants to lift dirt and pollen safely.
- Spray and Lift: Spray the product onto the pollen-covered area.
- Wipe Carefully: Use a clean microfiber towel to gently lift the pollen away. Work in one direction.
- Buff: Follow with a dry microfiber towel to buff.
Important Note: Always use products specifically designed for waterless washing. They contain polymers that encapsulate dirt particles, preventing them from scratching your paint. This is only suitable for light to moderate pollen coverage.
How to Remove Pollen from Car Interior
Pollen doesn’t just stay on the outside; it easily finds its way into your car’s interior, affecting air quality and cleanliness.
Interior Cleaning Supplies
- Microfiber Cloths: Essential for dusting and wiping surfaces.
- Vacuum Cleaner with Attachments: A crevice tool and brush attachment are useful.
- Interior Cleaner: A dedicated interior cleaner for dashboards, door panels, and seats.
- Glass Cleaner: For windows.
- Air Freshener (Optional): To combat any lingering pollen smells.
Cleaning the Car Interior
- Vacuum Thoroughly: Start by vacuuming carpets, floor mats, seats, and all crevices. Use brush attachments to agitate and lift pollen from fabric.
- Dust Surfaces: Use a dry microfiber cloth to gently dust the dashboard, center console, door panels, and steering wheel. Work from top to bottom.
- Wipe Down: Lightly mist an interior cleaner onto a clean microfiber cloth (never directly onto surfaces). Wipe down all hard surfaces.
- Clean Windows: Use a glass cleaner and a separate microfiber cloth for a streak-free shine on the inside of your windows.
- Cabin Air Filter: If pollen is a recurring issue, consider replacing your cabin air filter. A clogged filter can reduce airflow and not effectively trap incoming pollen.
The Importance of Waxing or Sealing After Pollen Removal
Once you’ve successfully removed pollen and any associated grime, protecting your car’s paint is crucial.
Why Protection Matters
- Easier Future Cleaning: A waxed or sealed surface is smoother, making it harder for dirt and pollen to adhere. Future pollen removal will be much easier.
- UV Protection: Waxes and sealants protect your paint from harmful UV rays, which can cause fading and damage.
- Enhanced Shine: A good wax or sealant will bring out the deep gloss of your car’s paint.
Application Methods
- Wax: Applied as a paste or liquid, wax provides a warm, deep shine and protection. It typically needs reapplication every 1-3 months.
- Sealant: These are synthetic polymers that offer longer-lasting protection (typically 4-6 months or more) and a slick, glossy finish.
- Ceramic Coatings: For the most durable and long-lasting protection, a ceramic coating can last for years. These are professional-grade products, but DIY kits are available.
Applying a wax or sealant is an excellent way to enhance your car detailing pollen efforts and keep your vehicle looking its best for longer.
Frequently Asked Questions About Pollen on Cars
Q1: How do I get pollen off my car without water?
For very light pollen, you can use a quick detailer spray or a waterless car wash product. Spray the product generously onto the pollen-covered area, then gently wipe it away with a clean, plush microfiber towel. Fold the towel frequently to expose a clean surface, and follow with a dry buffing towel. Always ensure you use products with good lubrication to avoid scratching.
Q2: Can I use a car duster to remove pollen?
While a car duster might seem like a quick fix, it’s generally not recommended for removing pollen. Traditional car dusters often just move the pollen around and can grind it into the paint, leading to scratches. Microfiber dusters are better, but still carry a risk compared to a proper wash or a quick detailer spray.
Q3: How often should I wash my car if it’s covered in pollen?
If your car is heavily coated in pollen, it’s best to wash it as soon as possible. Leaving pollen on for extended periods, especially if it gets wet and dries, can make it harder to remove and potentially damage the paint. Aim to wash it within a few days of it becoming significantly covered.
Q4: What is the best way to wash pollen off car?
The best way involves a pre-wash rinse to remove as much loose pollen as possible. Then, use the two-bucket wash method with a high-quality car wash soap and microfiber wash mitts. Always wash from top to bottom and rinse your mitt frequently in a separate bucket of clean water.
Q5: Can pollen damage my car’s paint?
Yes, pollen can damage your car’s paint if left on for too long. The abrasive nature of pollen particles, especially when wet and dried, can cause micro-scratches or swirl marks. Some pollen can also be slightly acidic, which could etch the clear coat over time. Prompt cleaning is key to preventing this damage.
By following these guidelines, you can effectively remove pollen from your car, keeping it looking clean and protecting its finish throughout the seasons. Remember, a little bit of proactive cleaning goes a long way!