Yes, in many situations, you can jump an RV battery with your car, but it’s not as simple as jump-starting another car. The primary challenge lies in the different electrical systems and battery capacities of RVs compared to standard vehicles.
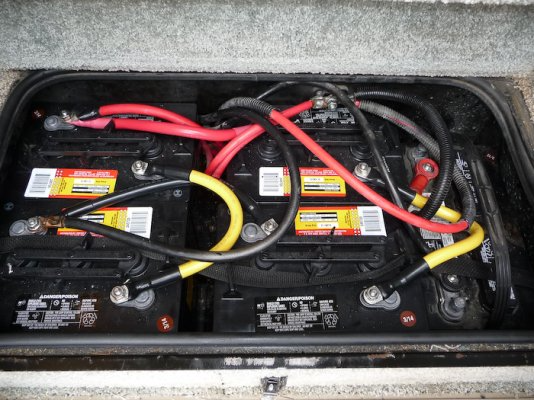
Image Source: www.lichtsinn.com
Fathoming the RV Electrical System
Recreational vehicles, or RVs, are essentially homes on wheels. This means they have a complex electrical system that goes beyond just powering the engine. While your car primarily relies on a single 12-volt battery to start its engine and run minimal accessories, an RV typically has at least two distinct battery banks:
- The Engine/Chassis Battery: This is similar to your car’s battery. It’s responsible for starting the RV’s engine and powering the vehicle’s lights, signals, and other chassis functions.
- The House Battery Bank: This is the powerhouse for all your living amenities. Think lights, refrigerator, water pump, television, microwave, and anything else you use when you’re not driving. These are often deep-cycle batteries, designed for sustained power delivery rather than quick bursts of starting power like your car’s engine battery. House battery banks can be comprised of one or more batteries, often wired in series or parallel to achieve higher voltage or amp-hour ratings.
This duality is crucial when considering a jump start RV battery. If your RV’s engine won’t start, it’s usually the chassis battery that’s dead. If your RV’s lights and appliances are out, but the engine still starts, it’s the house battery bank that needs attention.
Why Your Car Might Be a Solution (and When It Isn’t)
Your car’s battery, while smaller than a typical RV house battery bank, can provide the necessary amperage to boost RV battery with car. However, the success of this operation hinges on several factors:
When It Works Best:
- Dead Chassis Battery: If your RV’s engine battery is dead and the house batteries are charged, your car can often provide enough power to start the engine. This is the most straightforward scenario for a RV battery jump start car.
- Smaller RVs or Single-Battery Setups: Some smaller Class B or C motorhomes might have a setup where the chassis and house batteries are more closely linked or the house battery bank is less substantial.
- Using the Right Technique: Proper connecting car to RV battery procedures are paramount.
When It’s Risky or Won’t Work:
- Dead House Battery Bank: Attempting to jump starting dead RV battery bank, especially a large deep-cycle system, with a small car battery is often futile. The sheer capacity difference means your car’s battery will likely drain very quickly without providing enough power.
- Voltage Mismatch (Rare but Possible): While most RVs use 12-volt systems, some older or specialized RVs might have 24-volt systems. You must ensure both vehicles are operating on the same voltage.
- Incorrect Connections: This is the most dangerous pitfall. Incorrectly connecting car to RV battery can damage both vehicles’ electrical systems, cause fires, or even explosions.
- Damaged RV Batteries: If the RV batteries are internally damaged, a jump start may not be possible or effective.
How to Jump Start An RV Battery With Your Car: A Step-by-Step Guide
If you’ve determined that your RV’s chassis battery is dead and you need to jump start RV, here’s how to do it safely. This process focuses on jump-starting the RV’s engine battery using your car.
What You’ll Need:
- Heavy-Duty Jumper Cables: Do NOT use thin, light-duty cables. RV batteries, especially the chassis battery, can draw significant current. Opt for cables with at least 4-gauge thickness, preferably 2-gauge, and a good length (15-20 feet).
- Your Car: A running vehicle with a charged battery.
- Safety Gear: Gloves and eye protection are recommended.
- Owner’s Manuals: For both your RV and your car. These can provide specific instructions or warnings.
- Patience and Precision: Rushing this can lead to costly mistakes.
The Procedure:
Step 1: Park Safely
- Park your car as close to the RV as possible, ensuring the jumper cable can reach both batteries without stretching.
- Turn off both vehicles completely. Engage the parking brake on both.
- Open the hoods of both vehicles and locate the batteries. On an RV, the chassis battery might be in the engine compartment, under the steps, or in a compartment accessible from the outside. Consult your owner’s manual if you’re unsure.
Step 2: Identify Battery Terminals
- Locate the positive (+) and negative (-) terminals on both batteries. They are usually clearly marked.
- Crucially, be aware of any battery disconnect switches on your RV. If there is a main house battery disconnect or a chassis battery disconnect, ensure it’s in the ON position if you intend to jump the chassis battery. If you are attempting to jump start RV battery from the house battery, you may need to bypass or turn on the relevant disconnects. For this guide, we are focusing on the engine start.
Step 3: Make the Connections (The Critical Part)
This is where precision is vital. Follow this sequence precisely to minimize the risk of sparks or damage:
- Connect one RED clamp to the POSITIVE (+) terminal of the DEAD RV battery.
- Connect the other RED clamp to the POSITIVE (+) terminal of the GOOD car battery.
- Connect one BLACK clamp to the NEGATIVE (-) terminal of the GOOD car battery.
- Connect the final BLACK clamp to a clean, unpainted METAL surface on the RV’s engine block or chassis, AWAY from the battery, fuel lines, and moving parts. This is the grounding point and is crucial to prevent sparks near the battery, which could ignite hydrogen gas emitted by the battery. Do NOT connect it to the negative terminal of the dead RV battery unless your RV manual specifically instructs you to do so and you are absolutely certain of the procedure. The car to RV battery connection needs to be robust.
Visual Aid for Connections:
| Cable End | Connects To |
|---|---|
| Red Clamp 1 | Positive (+) terminal of Dead RV Battery |
| Red Clamp 2 | Positive (+) terminal of Good Car Battery |
| Black Clamp 1 | Negative (-) terminal of Good Car Battery |
| Black Clamp 2 | Unpainted Metal Grounding Point on RV Chassis |
Step 4: Start the Donor Vehicle (Your Car)
- Start your car’s engine.
- Let it run for at least 5-10 minutes. Revving the engine slightly (to around 1500-2000 RPM) can help charge the RV battery a bit faster and provide more power. This is essentially RV charging from car.
Step 5: Attempt to Start the RV
- While your car is running, try to start the RV’s engine.
- If the RV starts, great! Let both vehicles run for a few more minutes.
- If the RV doesn’t start, wait another 5 minutes with your car running, then try again. Don’t crank the RV engine for more than 10-15 seconds at a time to avoid overheating the starter motor.
Step 6: Disconnect the Cables (Reverse Order)
Once the RV is running, disconnect the jumper cables in the REVERSE order of how you connected them. This is just as important as the connection process:
- Remove the BLACK clamp from the RV’s metal grounding point.
- Remove the BLACK clamp from the car battery’s negative terminal.
- Remove the RED clamp from the car battery’s positive terminal.
- Remove the RED clamp from the RV battery’s positive terminal.
Step 7: Keep the RV Running
- After the RV starts, let it run for at least 20-30 minutes. Driving it around is even better. This allows the RV’s alternator to recharge its own chassis battery. This is a key aspect of using car to start RV successfully.
Specific Considerations for RV Battery Help Car Scenarios
When you’re looking for RV battery help car, remember the house battery system. While the above steps are for the engine, what if your house batteries are drained?
Jump-Starting the House Batteries:
This is significantly more complex and often not feasible with a standard car.
- Deep Cycle Batteries: RV house batteries are typically deep-cycle, meaning they are designed to be discharged more deeply and recharged over longer periods. They also have a much higher capacity (measured in Amp-hours) than a car battery.
- Voltage vs. Capacity: Your car’s battery might have the same voltage (12V), but it lacks the sustained amperage and capacity to effectively charge or boost RV battery with car bank, especially if it’s a substantial system of two or more 6V or 12V batteries.
- Potential for Damage: Trying to force charge a large, deeply discharged deep-cycle battery with a small car battery can overheat both batteries and potentially damage them.
Alternative Solutions for Dead House Batteries:
- Solar Panels: If your RV is equipped with solar, ensure they are functioning and have had time to charge.
- Shore Power: Connect to a campground’s electrical hookup.
- RV Generator: Use the RV’s onboard generator.
- Portable Power Station: These can often provide enough power for essential RV functions.
- Dedicated RV Battery Charger: The safest and most effective way to recharge dead house batteries.
- Travel Trailer Towing (Special Case): If you are towing a travel trailer with its own house battery, the vehicle’s alternator can sometimes charge the trailer battery through the 7-way connector while driving, effectively providing RV charging from car. However, this is usually a trickle charge and may not be sufficient for a deeply depleted battery.
Troubleshooting and When to Call a Professional
Even with careful adherence to the steps, you might encounter issues.
Common Problems:
- No Crank, No Lights: Indicates a completely dead battery or a severe connection issue. Double-check all clamp connections.
- Clicking Sound: This often means there’s some power, but not enough to turn the starter motor. Try letting the car run longer to build up more charge.
- Car Battery Drains Quickly: If your car’s battery seems to be dying while trying to jump the RV, it could mean the RV battery is severely shorted, or your car’s battery is too weak.
- No Power to RV Appliances (but engine starts): This points to an issue with the house battery bank or its disconnects, not the chassis battery.
When to Seek Professional Help:
- Uncertainty: If you’re not comfortable with any part of the process, don’t guess.
- Repeated Failures: If multiple attempts to jump the RV fail.
- Visible Battery Damage: Swollen batteries, leaks, or corrosion.
- Electrical System Issues: If you suspect a deeper problem with your RV’s charging system or wiring.
- Specific RV Battery Types: Some high-end RVs might use specialized battery chemistries (like Lithium-ion) that require different charging methods.
Protecting Your RV and Car Electrical Systems
A little knowledge can go a long way in preventing expensive repairs.
Key Prevention Tips:
- Regular Battery Maintenance: Check your RV and car batteries regularly for corrosion. Clean terminals and ensure they are secure.
- Battery Maintainers: When the RV is in storage, use a trickle charger or battery maintainer designed for deep-cycle batteries to keep them topped up.
- Battery Load Testing: Periodically have your RV batteries tested to ensure they are still holding a charge effectively.
- Proper Cable Storage: Store your jumper cables in a dry place where they won’t get damaged.
- Know Your RV: Familiarize yourself with the location of your batteries, disconnect switches, and chassis components.
Frequently Asked Questions (FAQ)
Q1: Can I use my car to jump start my RV’s house batteries?
A: Generally, no. A car’s battery is not designed to charge a large, deep-cycle RV house battery bank. It’s best to use a proper RV battery charger, generator, or shore power for house batteries.
Q2: What size jumper cables do I need to jump an RV?
A: For an RV, you need heavy-duty jumper cables, ideally 4-gauge or 2-gauge, and at least 15 feet long. Thin cables are insufficient and can be dangerous.
Q3: How long should I let my car run to charge the RV battery?
A: Let your car run for at least 5-10 minutes at slightly elevated RPMs before attempting to start the RV. After the RV starts, let both vehicles run for a few more minutes, and then drive the RV for at least 20-30 minutes to allow its alternator to recharge the chassis battery.
Q4: What’s the difference between starting batteries and deep-cycle batteries in an RV?
A: Starting (or cranking) batteries are designed for quick, high bursts of power to start an engine. Deep-cycle batteries are designed for sustained, lower-level power output over long periods to run appliances and lights. RVs typically have both.
Q5: My RV has two batteries. Which one can I jump with my car?
A: You can typically jump-start the RV’s chassis battery (the one used to start the engine) with your car. The house batteries (used for living amenities) are a different system and usually cannot be jump-started effectively by a car.
Q6: What if I connect the jumper cables wrong?
A: Connecting jumper cables incorrectly can cause sparks, damage the batteries, blow fuses, or even fry the sensitive electronics in modern vehicles and RVs. It’s critical to follow the correct connection sequence precisely.
By following these guidelines, you can effectively use your car to provide RV battery help car for starting your RV’s engine, but always prioritize safety and know the limitations of your vehicles.